DP engineering
Optical measurement slashes machining down time.
Tecnology: VICIVISION Techno series
Sector: Aeronautics
A precision sub-contract engineering firm established almost 70 years ago, David Paull (CNC) Engineering, has built a strong reputation for delivering quality products.
The often-critical components it machines are used across a wide range of industries including marine, aerospace, defense, oil and gas, pneumatic sectors, meaning form, function and safety cannot be compromised.
Operating on both a large and small scale, the Cornwall, UK based company prides itself on its fundamental philosophy of offering a tailored, state-of-the-art engineering service to clients, where accuracy is paramount. While the business’s values have remained a constant guiding light, it retains strong ambitions for further development and growth.

One key area identified by DP Engineering as prime for improvement was the quality control side of its operations. Due to the complexity of its products and the materials used, the company has in the past been heavily reliant on manual inspection methods.
The time-consuming nature of this traditional approach was proving a major concern for a business with aspirations to increase its capacity and productivity. In addition, the subjective nature of manual measurement brings with it the risk of inaccuracy, as the process is neither repeatable nor quick enough to be applied to anything other than batch sampling.
To help meet its objectives, DP turned to VICIVISION UK; a leading supplier of optical, non-contact, turned-part measurement machines and quality control systems across the UK and Ireland.
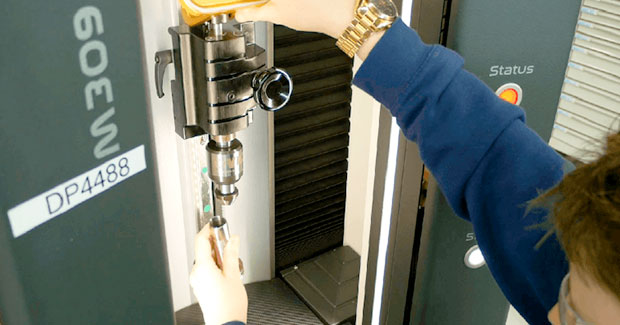
It installed the M309, a shop-floor ready system with wide measuring fields, impressive load capacities, high-resolution capabilities and intuitive software, designed to measure cylindrical components quickly and with absolute precision in the heart of the production environment.
Part of the VICIVISION Techno range, the M309 makes immediate inspection available next to multiple machining centers, to more than one operator, eliminating bottlenecks and leading to a reduction in idle time as there is no need to leave the production environment.
Its superior and automated high-resolution video camera technology carries out a number of checks on a single set-up, eliminating the need for multiple specific manual instruments. Even the most complex parts can be inspected in a matter of seconds, down to the last minute detail. Fast, non-contact, non-destructive measurement on an all-in-one system is done at the touch of a button, with fast and efficient batch changing contributing to greater throughput.
With increased productivity comes increased capacity, allowing businesses to take on more work with the confidence that demand and quality standards can be met.


